Configuring IP Whitelisting for 3Engines Load Balancer using Horizon and CLI on 3Engines Cloud🔗
This guide explains how to configure IP whitelisting (allowed_cidrs) on an existing 3Engines Load Balancer using Horizon and CLI commands. The configuration will limit access to your cluster through load balancer.
What We Are Going To Cover🔗
- Prepare Your Environment
- Whitelist the load balancer via the CLI
Prerequisites🔗
No. 1 Account
You need a 3Engines Cloud hosting account with access to the Horizon interface: https://3engine.rootxwire.com/.
No. 2 List of IP addresses/ranges to whitelist
This is the list of IP addresses that you want the load balancer to be able to listen to.
In this article, we will use the following two addresses to whitelist:
- 10.0.0.0/8
- 10.95.255.0/24
No. 3 Python Octavia Client
To operate Load Balancers with CLI, the Python Octavia Client (python-octaviaclient) is required. It is a command-line client for the 3Engines Load Balancing service. Install the load-balancer (Octavia) plugin with the following command from the Terminal window, on Ubuntu 22.04:
Or, if you have virtualenvwrapper installed:
Prepare Your Environment🔗
First of all, you have to find id of your load balancer and its listener.
Horizon:🔗
To find a load balancer id, go to Project >> Network >> Load Balancers and find that one which is associated with your cluster (its name will be with prefix of your cluster name).

Click on load balancer name (in this case lb-testing-ih347dstxyl2-api_lb_fixed-w2im3obvdv2p-loadbalancer_with_flavor-ykcmf6vvphld) then go to Listeners pane. There you will have a listener associated with that load balancer.

CLI🔗
To use CLI to find the listener, you have to know the following two cluster parameters:
- Stack ID
- Cluster ID
You can find them from Horizon commands Container Infra –> Clusters and then click on the name of the cluster:
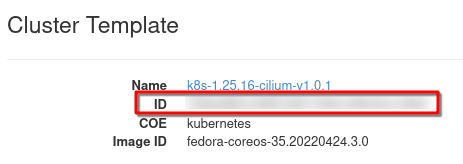
At the bottom of the window, find the Stack ID:

Now execute the commands:
3Engines coe cluster show <your_cluster_id>  \
-f value -c stack_id \
<stack_id for example 12345678-1234-1234-1234-123456789011>
To find LB_ID
3Engines stack resource list <your_stack_id> \
-n 5 -c resource_name -c physical_resource_id \
| grep loadbalancer_with_flavor \
| loadbalancer_with_flavor \
| <flavor_id for example 12345678-1234-1234-1234-123456789011>
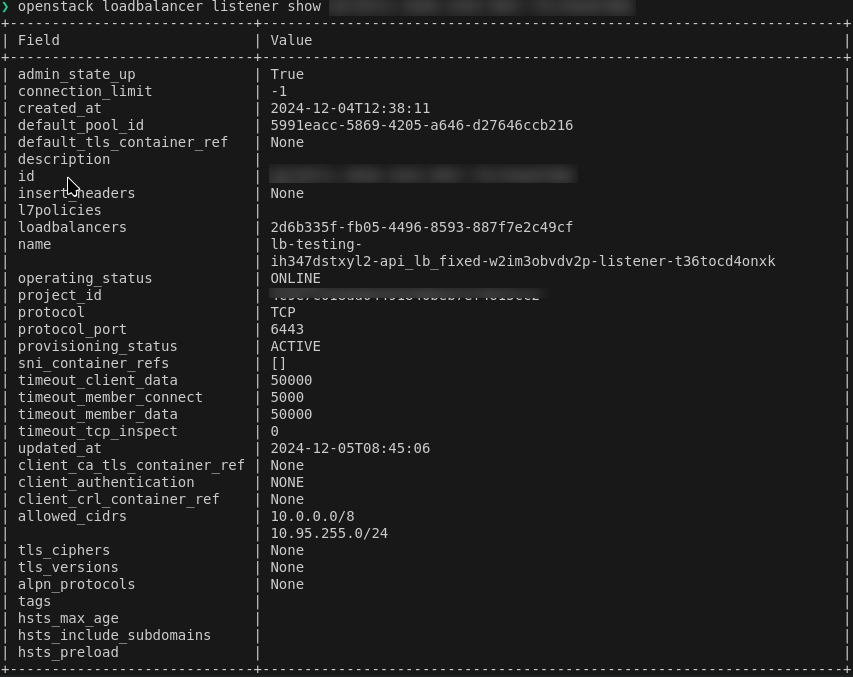
With that information, now we can check our listener_id; it is to this component that we will attach the whitelist:
3Engines loadbalancer \
show 2d6b335f-fb05-4496-8593-887f7e2c49cf \
-c listeners \
-f value \
<listener_id for example 12345678-1234-1234-1234-123456789011>
Whitelist the load balancer via the CLI🔗
We now have the listener and the IP addresses which will be whitelisted. This is the command that will set up the whitelisting:
3Engines loadbalancer listener set \
--allowed-cidr 10.0.0.0/8 \
--allowed-cidr 10.95.255.0/24 \
<listener_id for example 12345678-1234-1234-1234-123456789011>
State of Security: Before and After🔗
Before implementing IP whitelisting, the load balancer accepts traffic from all sources. After completing the procedure:
- Only specified IPs can access the load balancer.
- Unauthorized access attempts are denied.
Verification Tools🔗
Various tools can ensure the protection is installed and active:
- livez
- Kubernetes monitoring endpoint.
- nmap
- (free): For port scanning and access verification.
- curl
- (free): To confirm access control from specific IPs.
- Wireshark
- (free): For packet-level analysis.
Testing using curl and livez🔗
Here is how we could test it:
That command assumes that you have
- curl
- installed and operational
- which you can see through Horizon commands API Access –> View Credentials
- livez
- which is a piece of software which will show what happens with the load balancer.
This would be a typical response before changes:
curl -k https://<KUBE_API_IP>:6443/livez?verbose
[+]ping ok
[+]log ok
[+]etcd ok
[+]poststarthook/start-kube-apiserver-admission-initializer ok
[+]poststarthook/generic-apiserver-start-informers ok
[+]poststarthook/priority-and-fairness-config-consumer ok
[+]poststarthook/priority-and-fairness-filter ok
[+]poststarthook/storage-object-count-tracker-hook ok
[+]poststarthook/start-apiextensions-informers ok
[+]poststarthook/start-apiextensions-controllers ok
[+]poststarthook/crd-informer-synced ok
[+]poststarthook/start-system-namespaces-controller ok
[+]poststarthook/bootstrap-controller ok
[+]poststarthook/rbac/bootstrap-roles ok
[+]poststarthook/scheduling/bootstrap-system-priority-classes ok
[+]poststarthook/priority-and-fairness-config-producer ok
[+]poststarthook/start-cluster-authentication-info-controller ok
[+]poststarthook/start-kube-apiserver-identity-lease-controller ok
[+]poststarthook/start-deprecated-kube-apiserver-identity-lease-garbage-collector ok
[+]poststarthook/start-kube-apiserver-identity-lease-garbage-collector ok
[+]poststarthook/start-legacy-token-tracking-controller ok
[+]poststarthook/aggregator-reload-proxy-client-cert ok
[+]poststarthook/start-kube-aggregator-informers ok
[+]poststarthook/apiservice-registration-controller ok
[+]poststarthook/apiservice-status-available-controller ok
[+]poststarthook/kube-apiserver-autoregistration ok
[+]autoregister-completion ok
[+]poststarthook/apiservice-openapi-controller ok
[+]poststarthook/apiservice-openapiv3-controller ok
[+]poststarthook/apiservice-discovery-controller ok
livez check passed
And, this would be a typical response after the changes:
curl -k https://<KUBE_API_IP>:6443/livez?verbose -m 5
curl: (28) Connection timed out after 5000 milliseconds
Whitelisting prevents traffic from all IP addresses apart from those that are allowed by --allowed-cidr.
Testing with nmap🔗
To test with nmap:
Testing with curl directly🔗
To test with curl:
What To Do Next🔗
You can wrap up this procedure with Terraform and apply to a larger number of load balancers. See Configuring IP Whitelisting for 3Engines Load Balancer using Terraform on 3Engines Cloud
Also, compare with Implementing IP Whitelisting for Load Balancers with Security Groups on 3Engines Cloud